Every now and then a girl needs to post a DIY project, especially if it's simple and inexpensive.
If it happens to be the month of September and the project just happens to be fall-themed, even better.
These urns started out as flimsy white plastic containers from a thrift store. They were $2 each. I loved the shape and knew I could do something creative with them.
I mixed up a chalk paint mixture of 1/2 cup Sherwin Williams Pussywillow (a gray/taupe color) with 1/2 T unsanded grout and started painting. Chalk paint sticks to almost anything, including dirty, cheap plastic from a thrift store. Truly.
Here they are, still damp from the paint. This picture doesn't look much different; however, the paint color darkens as it dries.
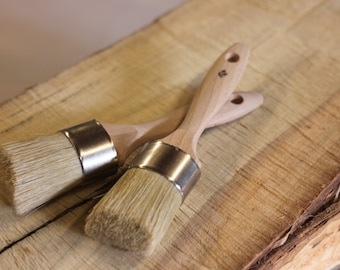
Once dry, I applied Annie Sloan's Dark Soft Wax,
with Miss Mustard Seed's waxing brush (although you can use any dry paint brush, or even a soft cloth),
...paying special attention to the grooves and curves of the urn. I wiped off the excess wax with a dry cloth.
You can see how the wax darkened the color of the urn to give it a rustic, aged depth that is SO much better than white plastic.
Filled with dried grass, a few pumpkins, and some colorful gourds, these urns make beautiful table centerpieces.
They would also be beautiful filled with ivy plants.
I love things like this that are extremely inexpensive but make a huge impact.
Happy 'Antiquing Wax' Fall to you and yours ~
Labels: Annie Sloan, Antiquing Wax, DIY, Fall